Trending

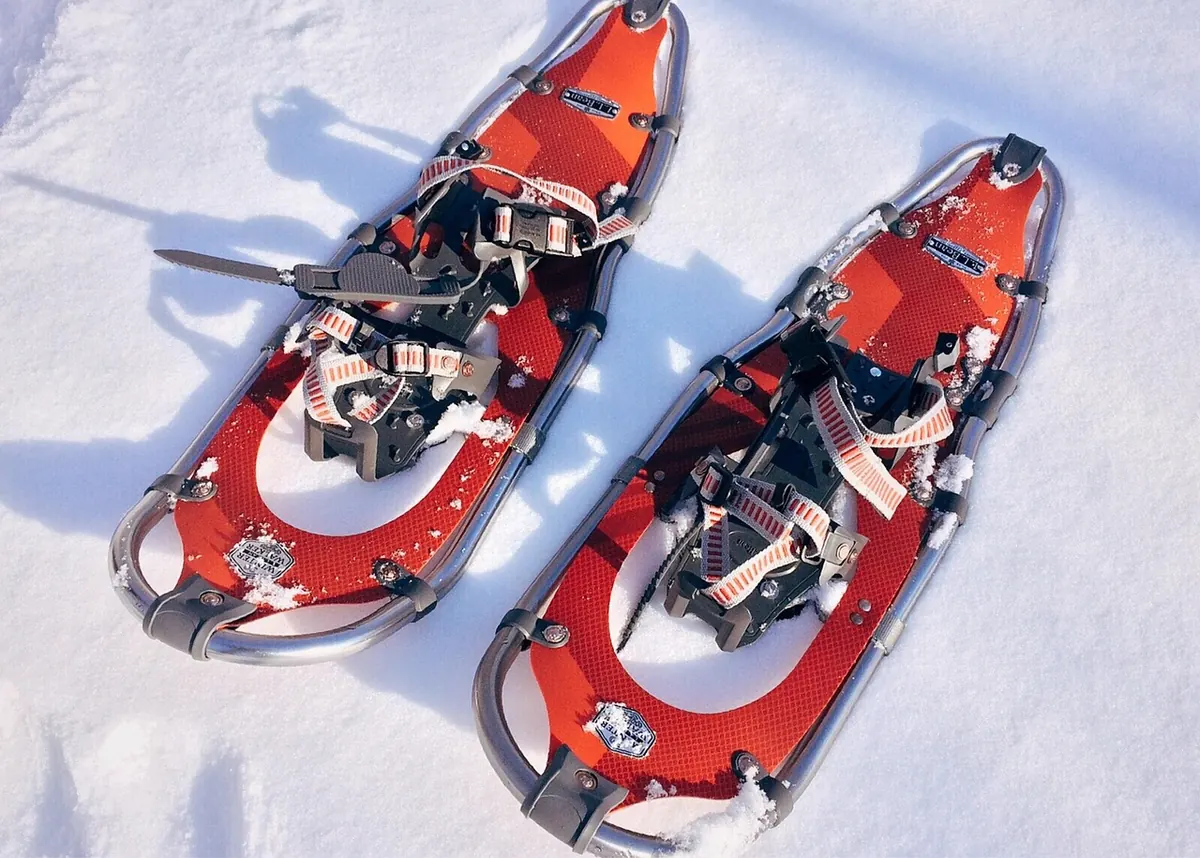
Snowshoes have a way of making winter feel bigger. The first time you step off a groomed path and hear nothing but the squeak of packed snow under your feet, the woods turn quiet and close in a way they never do in summer. It is also, happily, one of the easiest winter activities to start. You do not need lessons, a season pass, or much technique. You need boots you already own, a pair of rented snowshoes, and a trail that is short enough to leave you wanting more.
What follows is the shape of a realistic first day: what to rent, what to wear, where to go, and how to walk without tripping over your own feet.
Most alpine towns have at least one rental shop, often the same place that hires out skis and sledges. Walk in the day before if you can, or arrive early on the morning itself. Shops get busy after a fresh snowfall, and the smallest and largest sizes go first.
Snowshoes are sized mainly by the weight they carry, including your pack and clothing, not by your height. Tell the person behind the counter your weight and what you plan to do — a flat forest loop versus a steeper climb — and let them match the pair. A longer deck floats better in powder; a shorter one turns more easily on packed trails. For a first outing on marked paths, a mid-length recreational pair is the sensible default.
Check three things before you leave the shop:
If you wear a larger boot, bring it with you. Rental bindings are forgiving but not infinitely so.
The classic mistake on a first snowshoe day is dressing for standing still. You will be working, often within ten minutes of leaving the car park, and you will sweat. Sweat is what makes people cold later. Aim to start slightly cool and add layers as needed, not the other way round.
Start with a thin base layer that moves moisture away from your skin — synthetic or merino, not cotton. Over that, a light fleece or thin insulated jacket. On top, a windproof and water-resistant shell you can unzip and, if it is mild, take off entirely. Keep a warm jacket in your pack for the moment you stop for lunch or a photo. Your legs want soft-shell or synthetic trousers, ideally with a water-resistant finish; jeans are a poor choice in snow for obvious reasons.
Warm gloves or mittens, plus a thin liner pair so you can take the outer layer off to adjust a binding without freezing. Boots should be waterproof, insulated, and above the ankle — snowshoe bindings grip a proper boot far better than a trainer. Gaiters are worth their small weight: they keep snow out of your boots when you step into anything soft. A warm hat and sunglasses or goggles finish the job; low winter sun on snow is genuinely hard on the eyes.
Pick a trail that is marked, packed by other people, and shorter than you think you need. Snowshoeing on soft snow is roughly twice the effort of walking the same distance on a path, and winter daylight ends early. A three-kilometre loop is a fine first day. Four or five kilometres is plenty if you are fit and the snow is firm.
Look for trails described as easy or family-friendly, groomed or well used, with gentle gradients and no exposed sections. Forest roads, valley floors, lakeside paths and meadow loops are ideal. Read the route description properly: a path that is a gentle walk in July can be a different proposition under a metre of snow, and a shortcut across a meadow may hide a ditch or a stream.
If the route crosses or runs beneath steep open slopes, treat that as a serious question, not a detail. Snowshoes give you floatation, not avalanche safety. Stick to marked, low-angle terrain for your first season, check the local avalanche forecast before you go, and if you want to go beyond that, book a course or a guide. That is the ordinary way people learn here, and it is worth the day.
The first hundred metres feel strange, then it clicks. Keep your stance a little wider than usual so the shoes do not clatter into each other. Walk with a slightly rolling, flat-footed stride rather than a heel strike. If you are on a packed trail, stay on it — wandering off the side is how beginners end up waist-deep in a drift.
On uphill sections, use the heel lift and take shorter steps, pressing the front crampons in. On descents, bend your knees a touch more than feels natural, keep your weight back, and let the whole deck settle onto the snow instead of stubbing the front. Poles help a great deal with balance, especially on uneven ground or if your knees complain on the way down; most rental shops have them.
If you do sink in deep snow, do not fight it. Step back onto the firmer ground you came from, or place the next step on the snow you have already compacted. Turning is easiest in small steps rather than one big swing.
Tell someone where you are going and when you expect to be back. Carry a phone with the route downloaded, since signal in valleys is unreliable. Turn around at a set time regardless of how close the viewpoint looks — winter afternoons darken quickly and the temperature drops with the light.
Watch for the small warning signs: cold fingers that stop hurting and go numb, wet feet, or a shiver that will not settle. Those mean it is time to add a layer, eat something, and head back. Carry water and a snack even for a short loop, because cold air and effort both take more out of you than you expect. If you have a heart condition, joint problems, or any other health concern, check with your doctor before heading out on snow.
Finish with dry clothes waiting in the car and a warm drink on the way home. Rinse and dry the snowshoes before returning them, and note what you would change next time: fewer layers, longer trail, better gloves. That last step matters more than it sounds. Almost everyone overdresses on their first outing and gets the distance about right on their second. Within a few trips you will have your own rhythm, a favourite loop, and a winter that no longer feels like something to sit out.
Photo: WOKANDAPIX / Pixabay